How to get personal domain email for free in G-Mail with a Cloudflare integration.

In today's digital age, establishing a professional online presence is crucial. A key aspect of this is having a personalized email address associated with your own domain. In this guide, we'll walk you through the process of setting up your personal domain email for free in Gmail, seamlessly integrated with Cloudflare.
Step 1: Choose and Register Your Domain
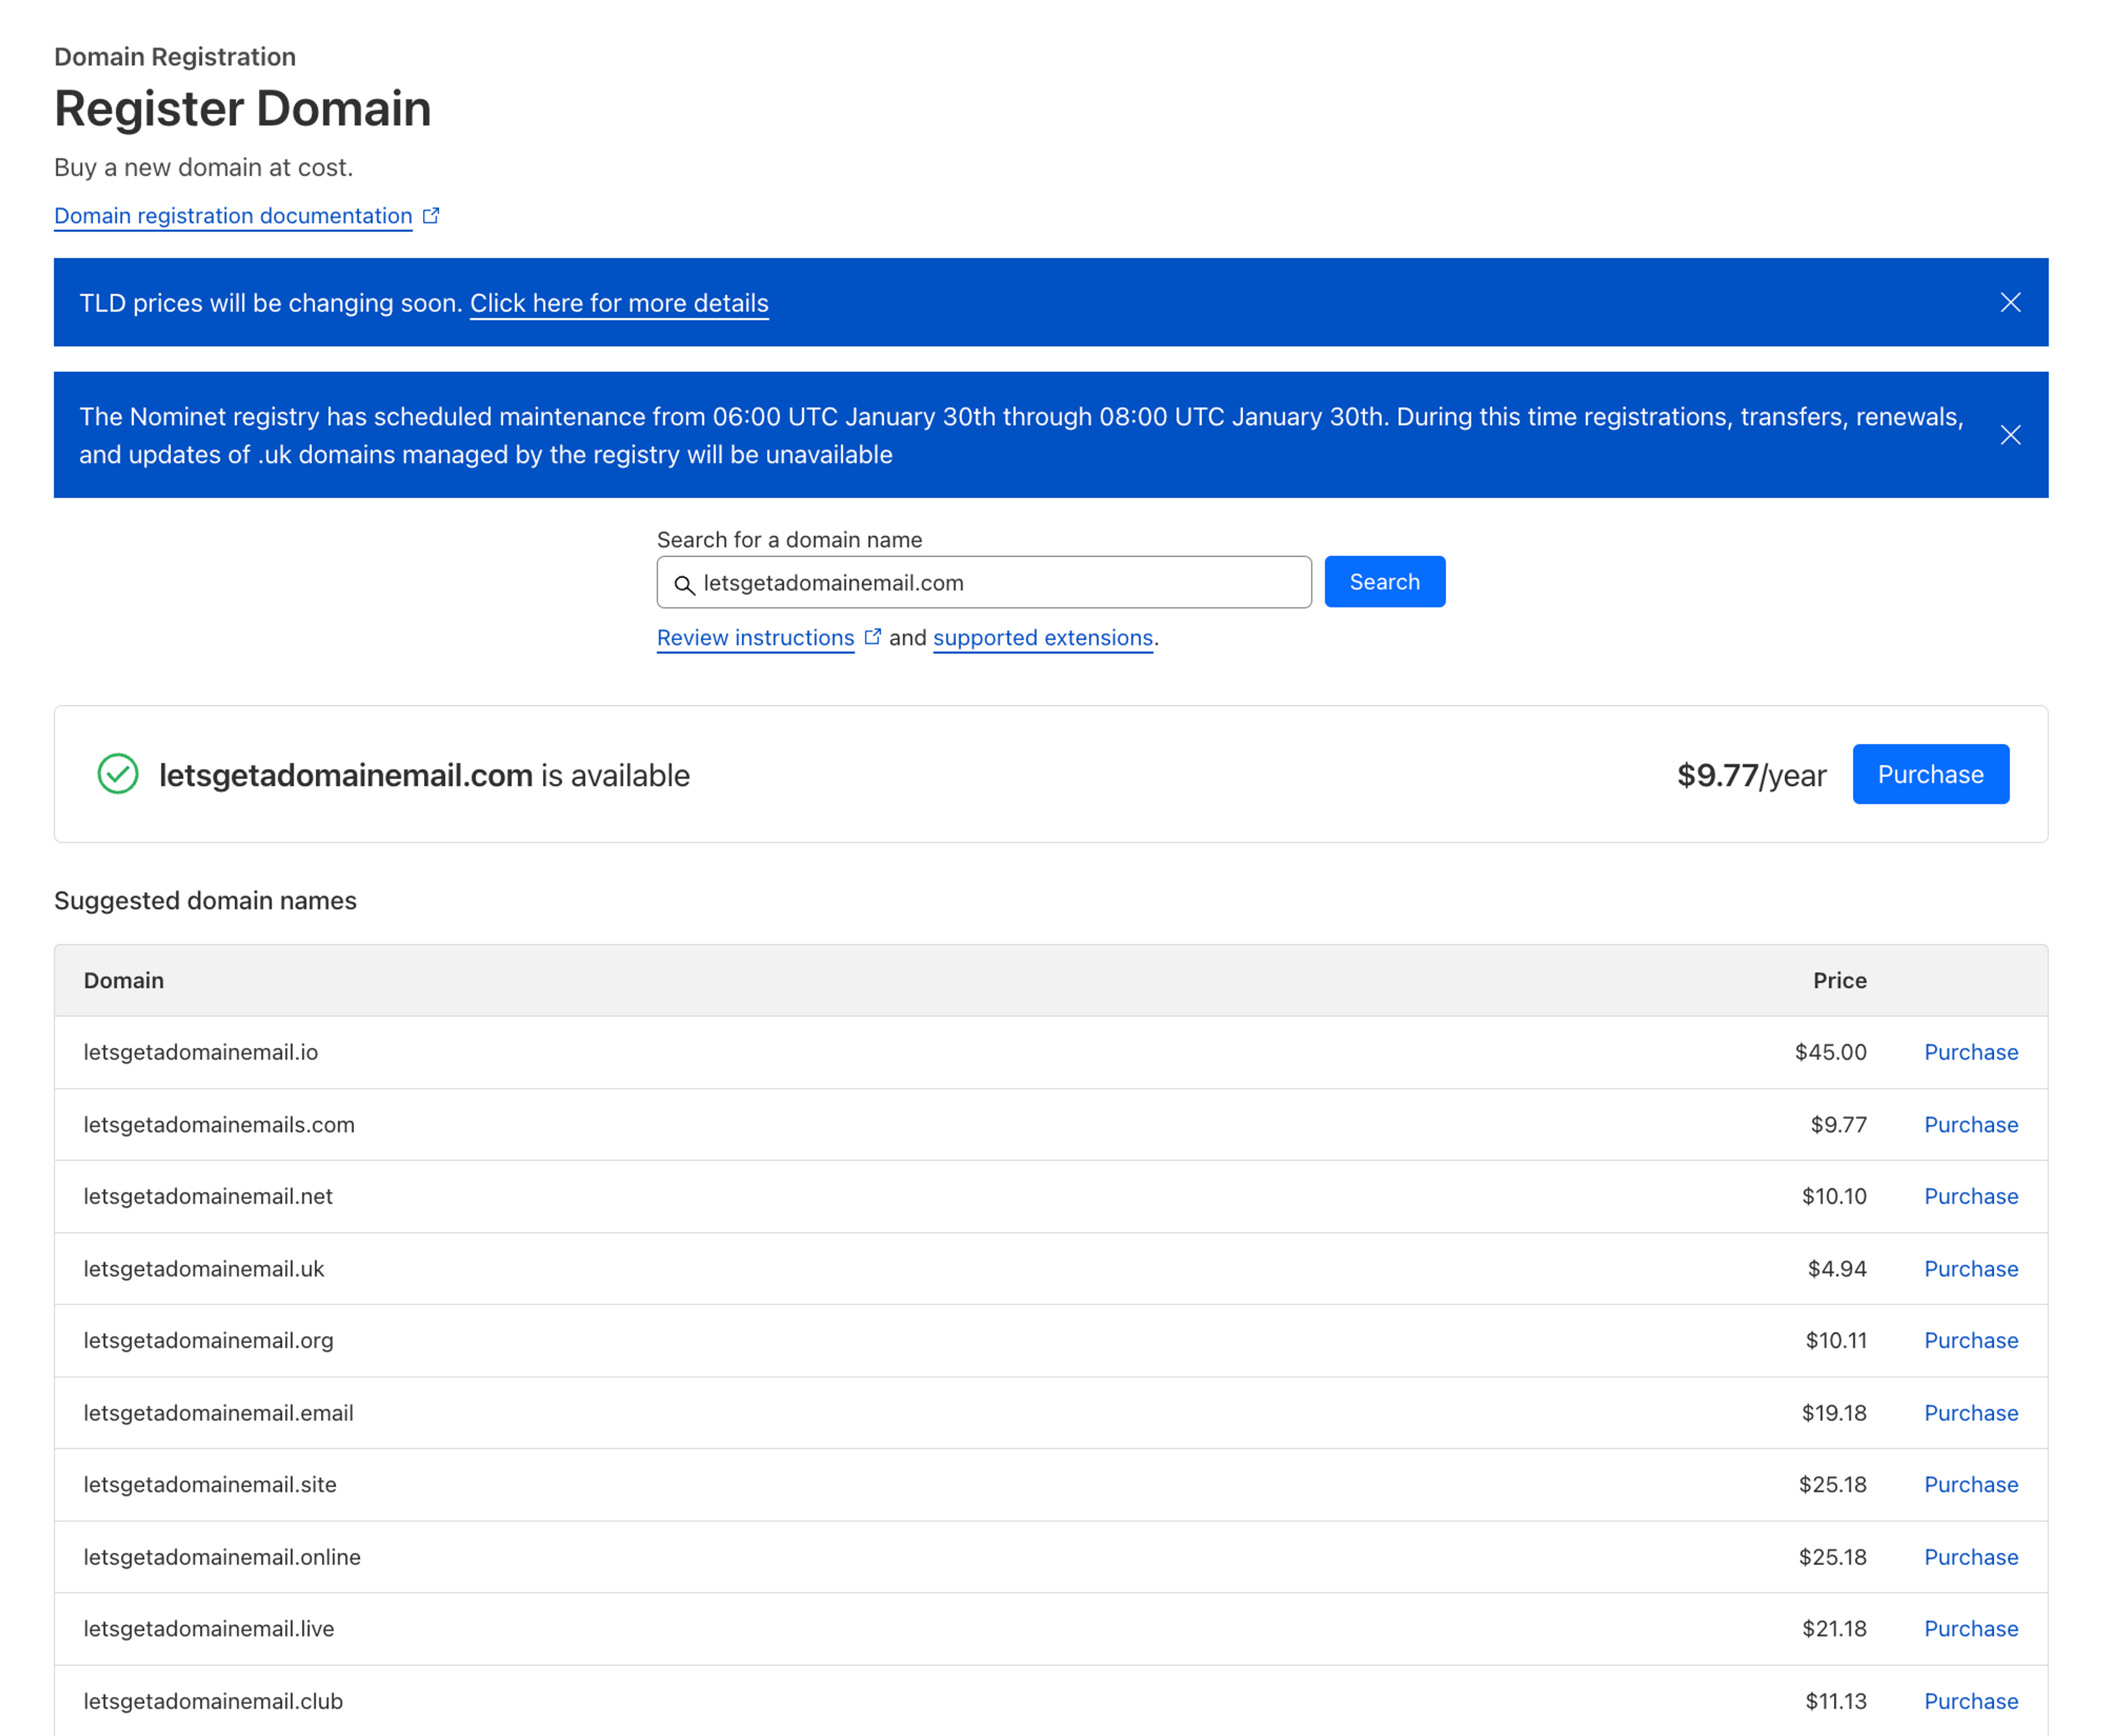
The journey begins with selecting and registering your own domain. Your domain is your online identity, so choose a name that reflects your personal or professional brand. You can go to any of the domain registrars to acquire a domain. In our case, in order to not use multiple platforms, we can get our domain directly from Cloudflare. You need to register an account in order to purchase the domain. Two other options that you could evaluate are Namecheap and GoDaddy, where you would link it with Cloudflare instead. You should be also mindful about the domain that you are getting, because a memorable site will most definitely help you to retain and gain customers. After getting a domain purchased, or if you already have one, you can continue to the next step. This will be the only payment needed if you don't have a domain already.
Step 2: Sign Up for a Gmail Account
Whether you're a seasoned Gmail user or creating an account for the first time, this step ensures that your personalised email is managed through Gmail. You can register for Gmail from the link here.
Step 3: Configure Cloudflare for Your Domain
After getting a Cloudflare account, you should log in and visit the dashboard. Select the site that you want to create a custom domain for and go into Email -> Email Routing section.
Cloudflare should give you instructions on what DNS entries should be added for your domain, those should be executed.
You should go to Routing rules tab, where you should set up email forwarding from your already existing Gmail address, to the one that you wish to have on your purchased domain.
You should see a window, where you should fill your data. Here is an example of how it could be done
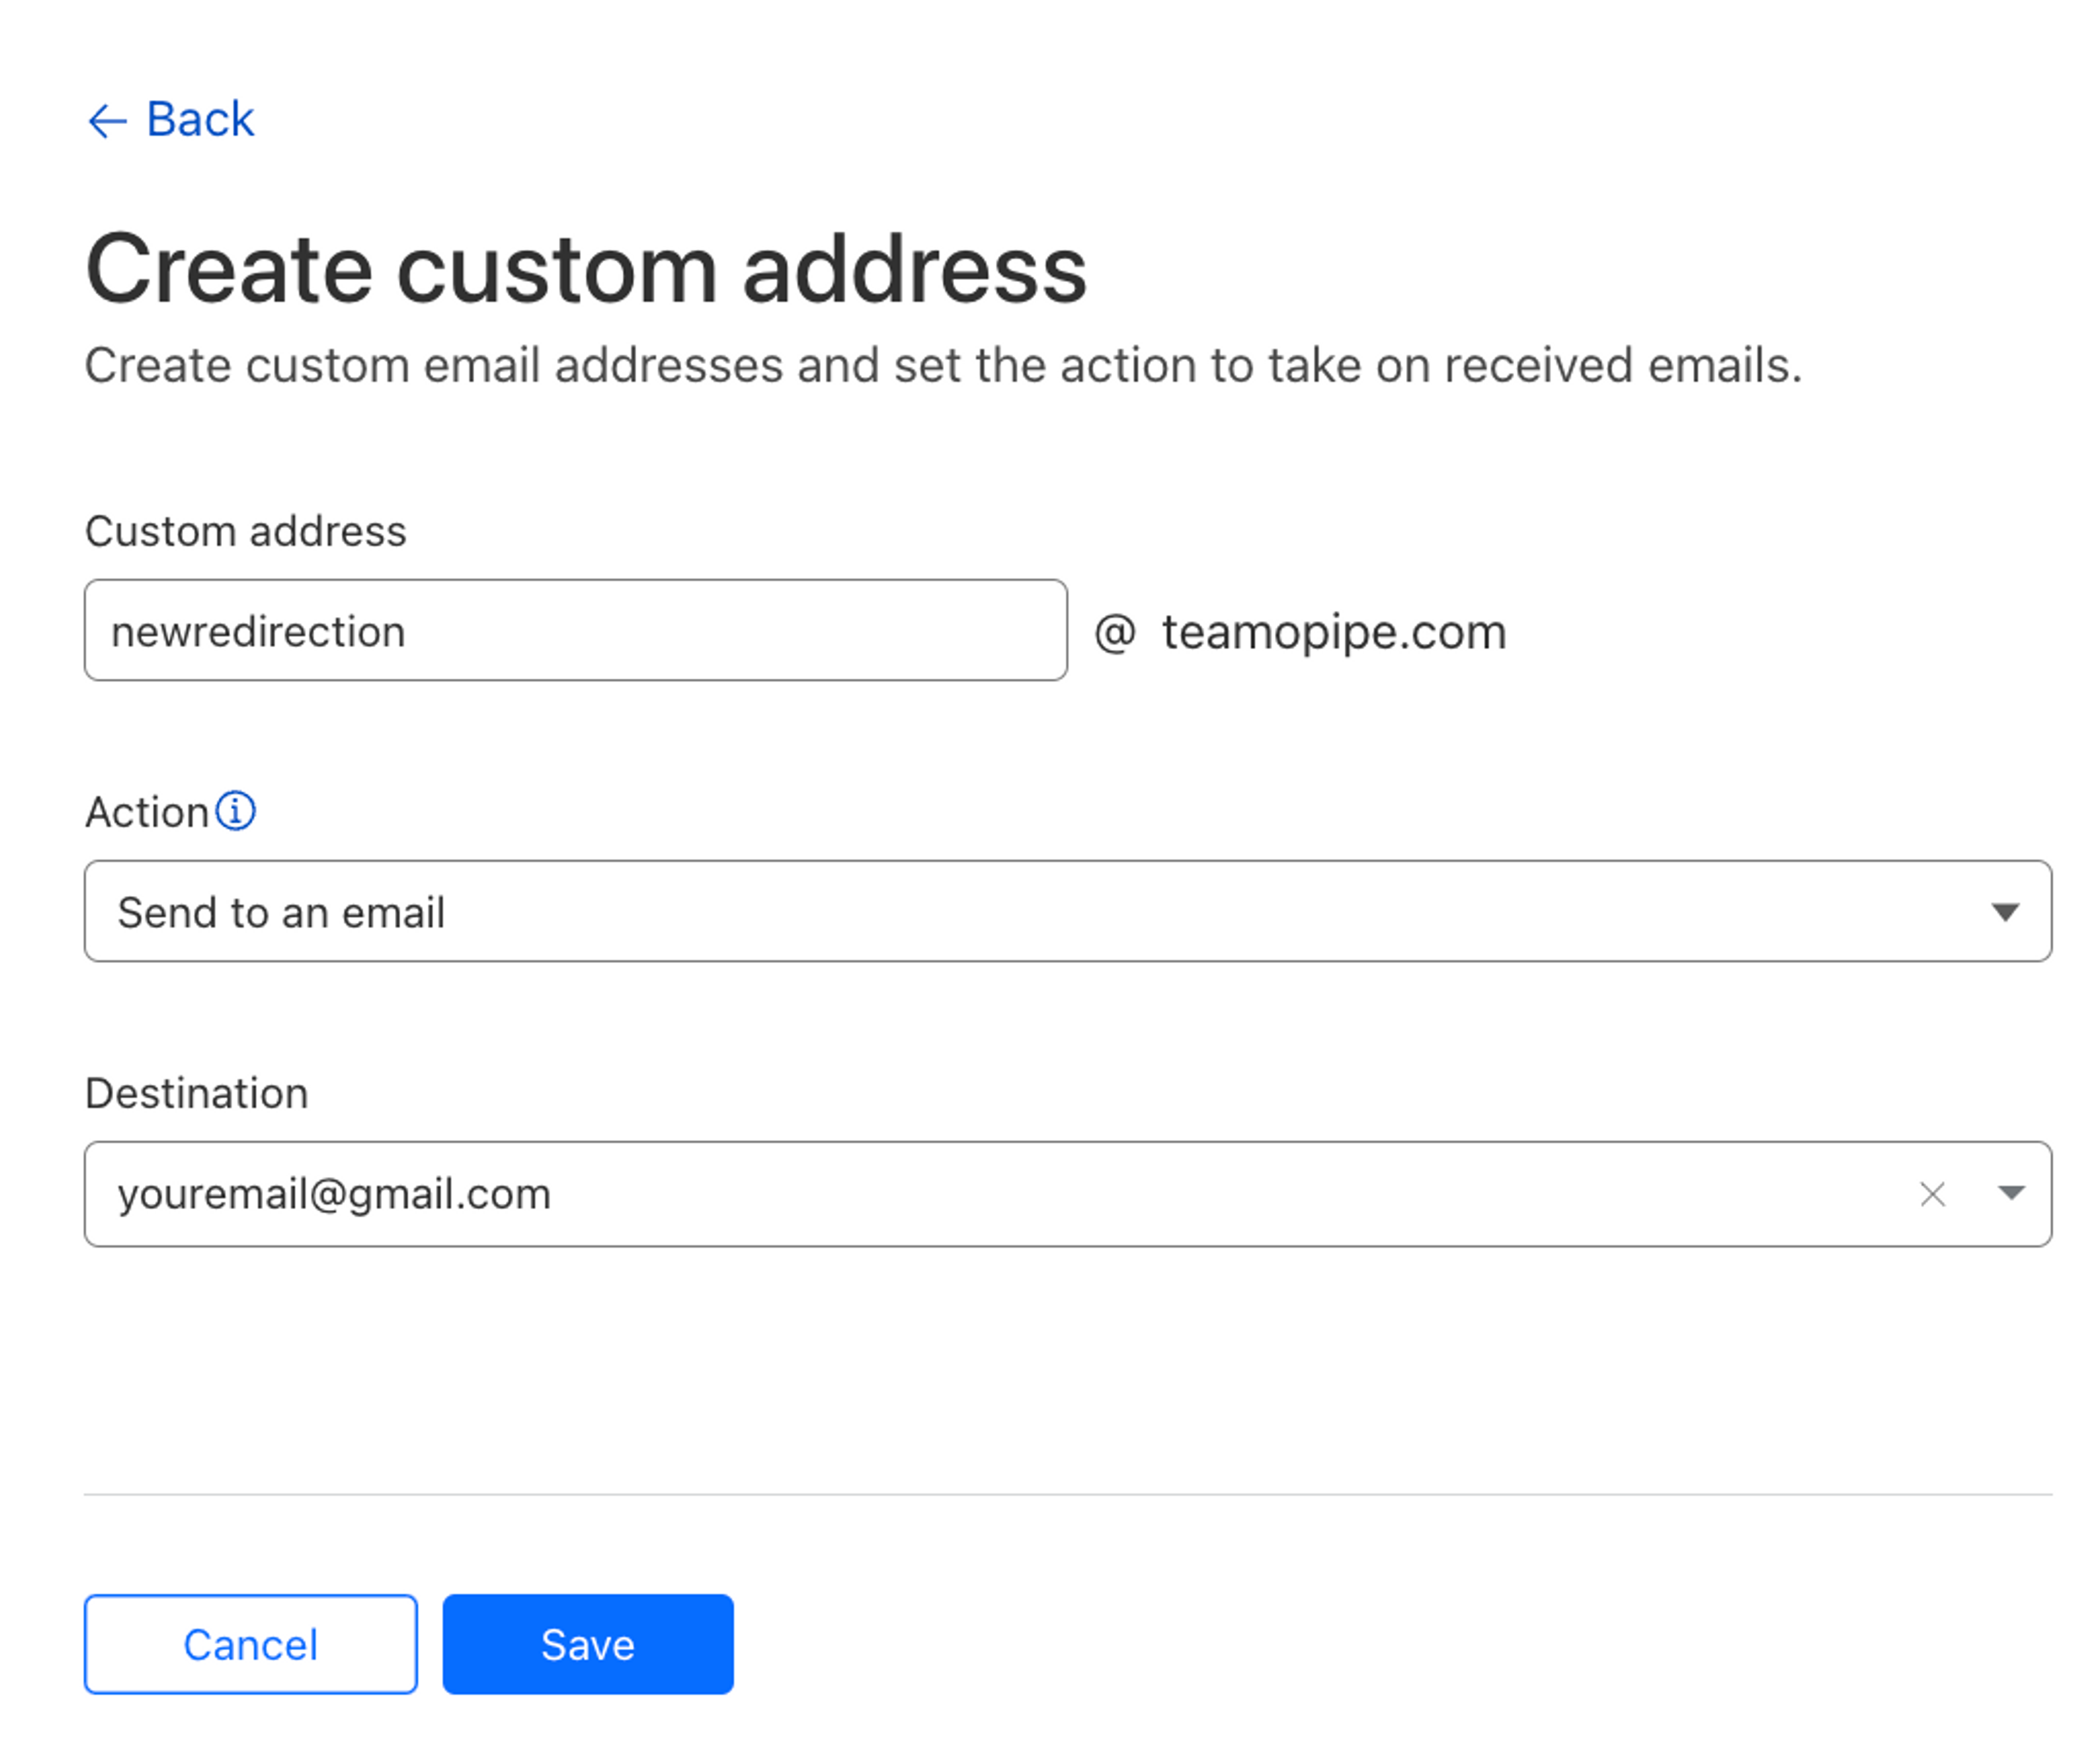
After setting up the redirection, an email should arrive at your inbox, where you should approve the email forwarding.
Step 4: Set Up Email Forwarding
Now that your domain and CloudFlare are configured, it's time to set up email forwarding. This feature allows you to receive emails sent to your custom domain directly in your Gmail inbox.
Firstly you need to set up 2 factor authentication for the Gmail account, which can be done in the Google account dashboard. For ease of access, you can try clicking here.
When this is done, you should generate an app password, which is available in the 2FA section of Google account dashboard.

After clicking on the App password tab, you should have the UI to generate select the name of the password, do so and submit.
When you do so, you will receive an app password, save it, as it will needed. This allows you to give access to 3rd party applications to interact with your Gmail account.
Afterwards you should go into Gmail account settings, which are available in the menu section, for quick access you can try clicking here.
When you do so, find the section Send mail as, where there is the button to Add another email address. When you do so, a new window will open, where data should be filled.
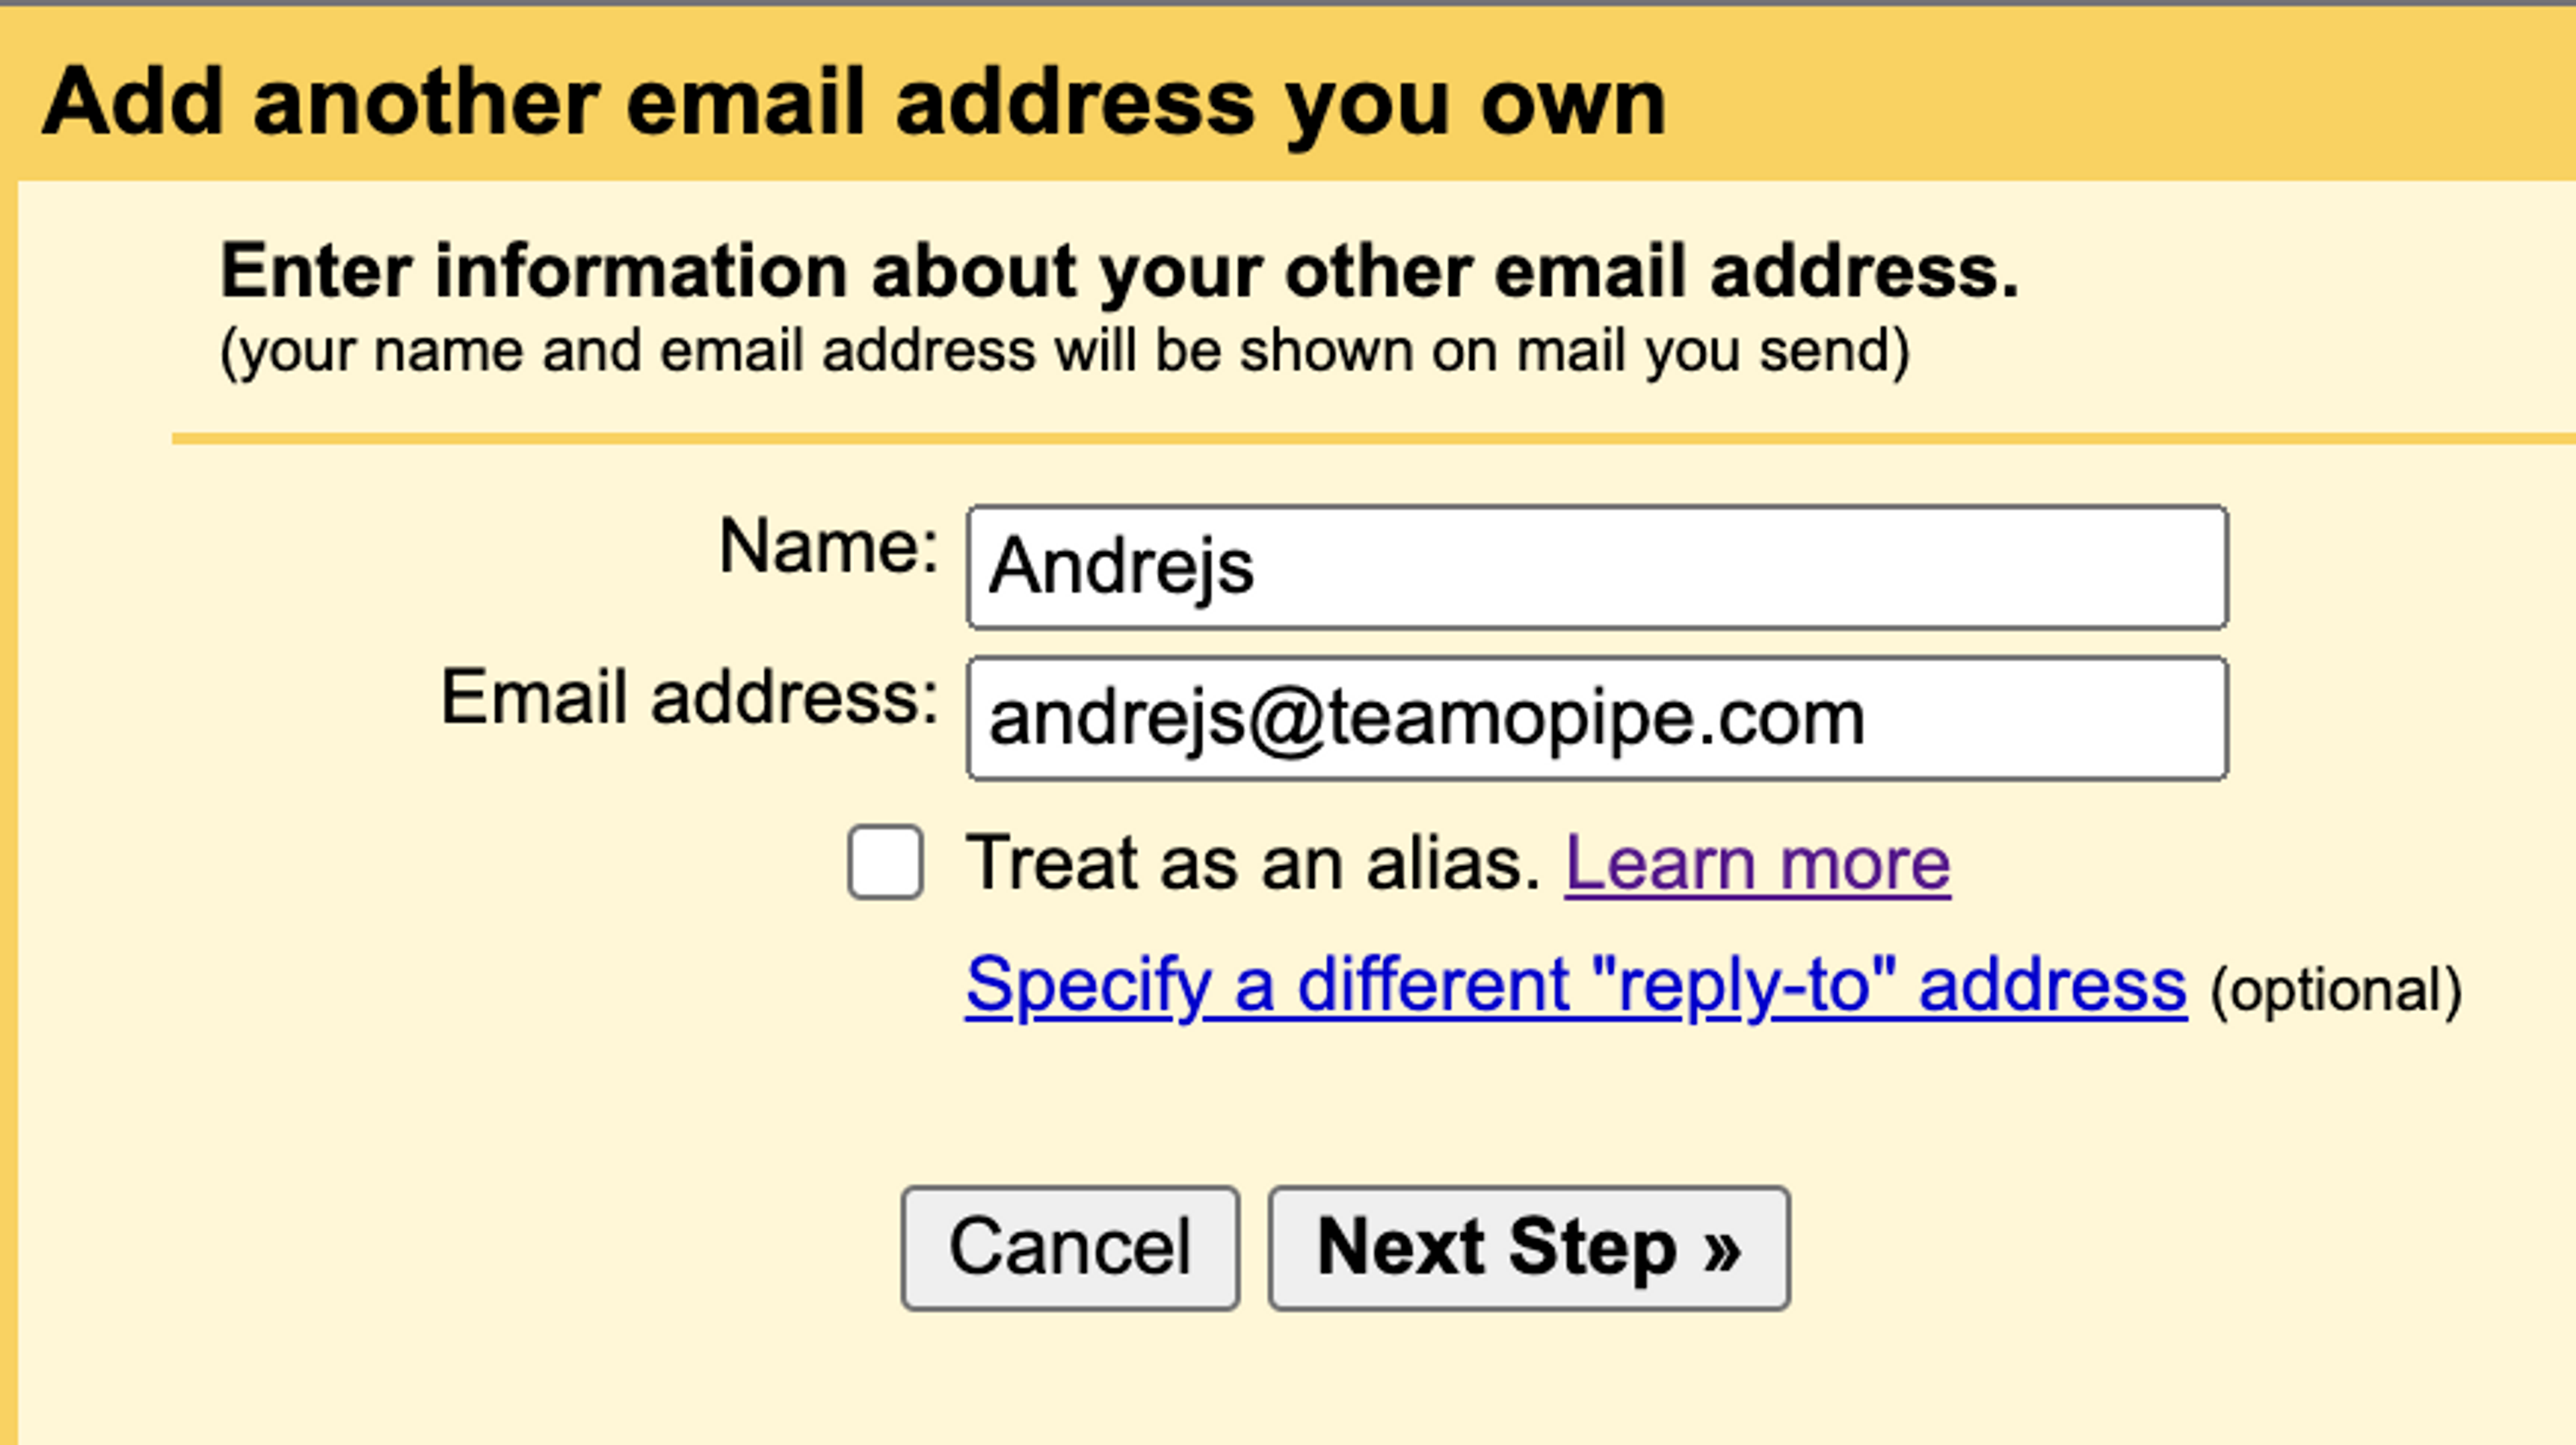
Add the email address of the new domain, as well as your name. Make sure you do not make the email address as an alias. Press continue.
Fill the data in the next page so that the data following are
SMTP server: smtp.gmail.com
username: email that you created the app password for
password: the generated password (you could have to remove the spaces between the words)
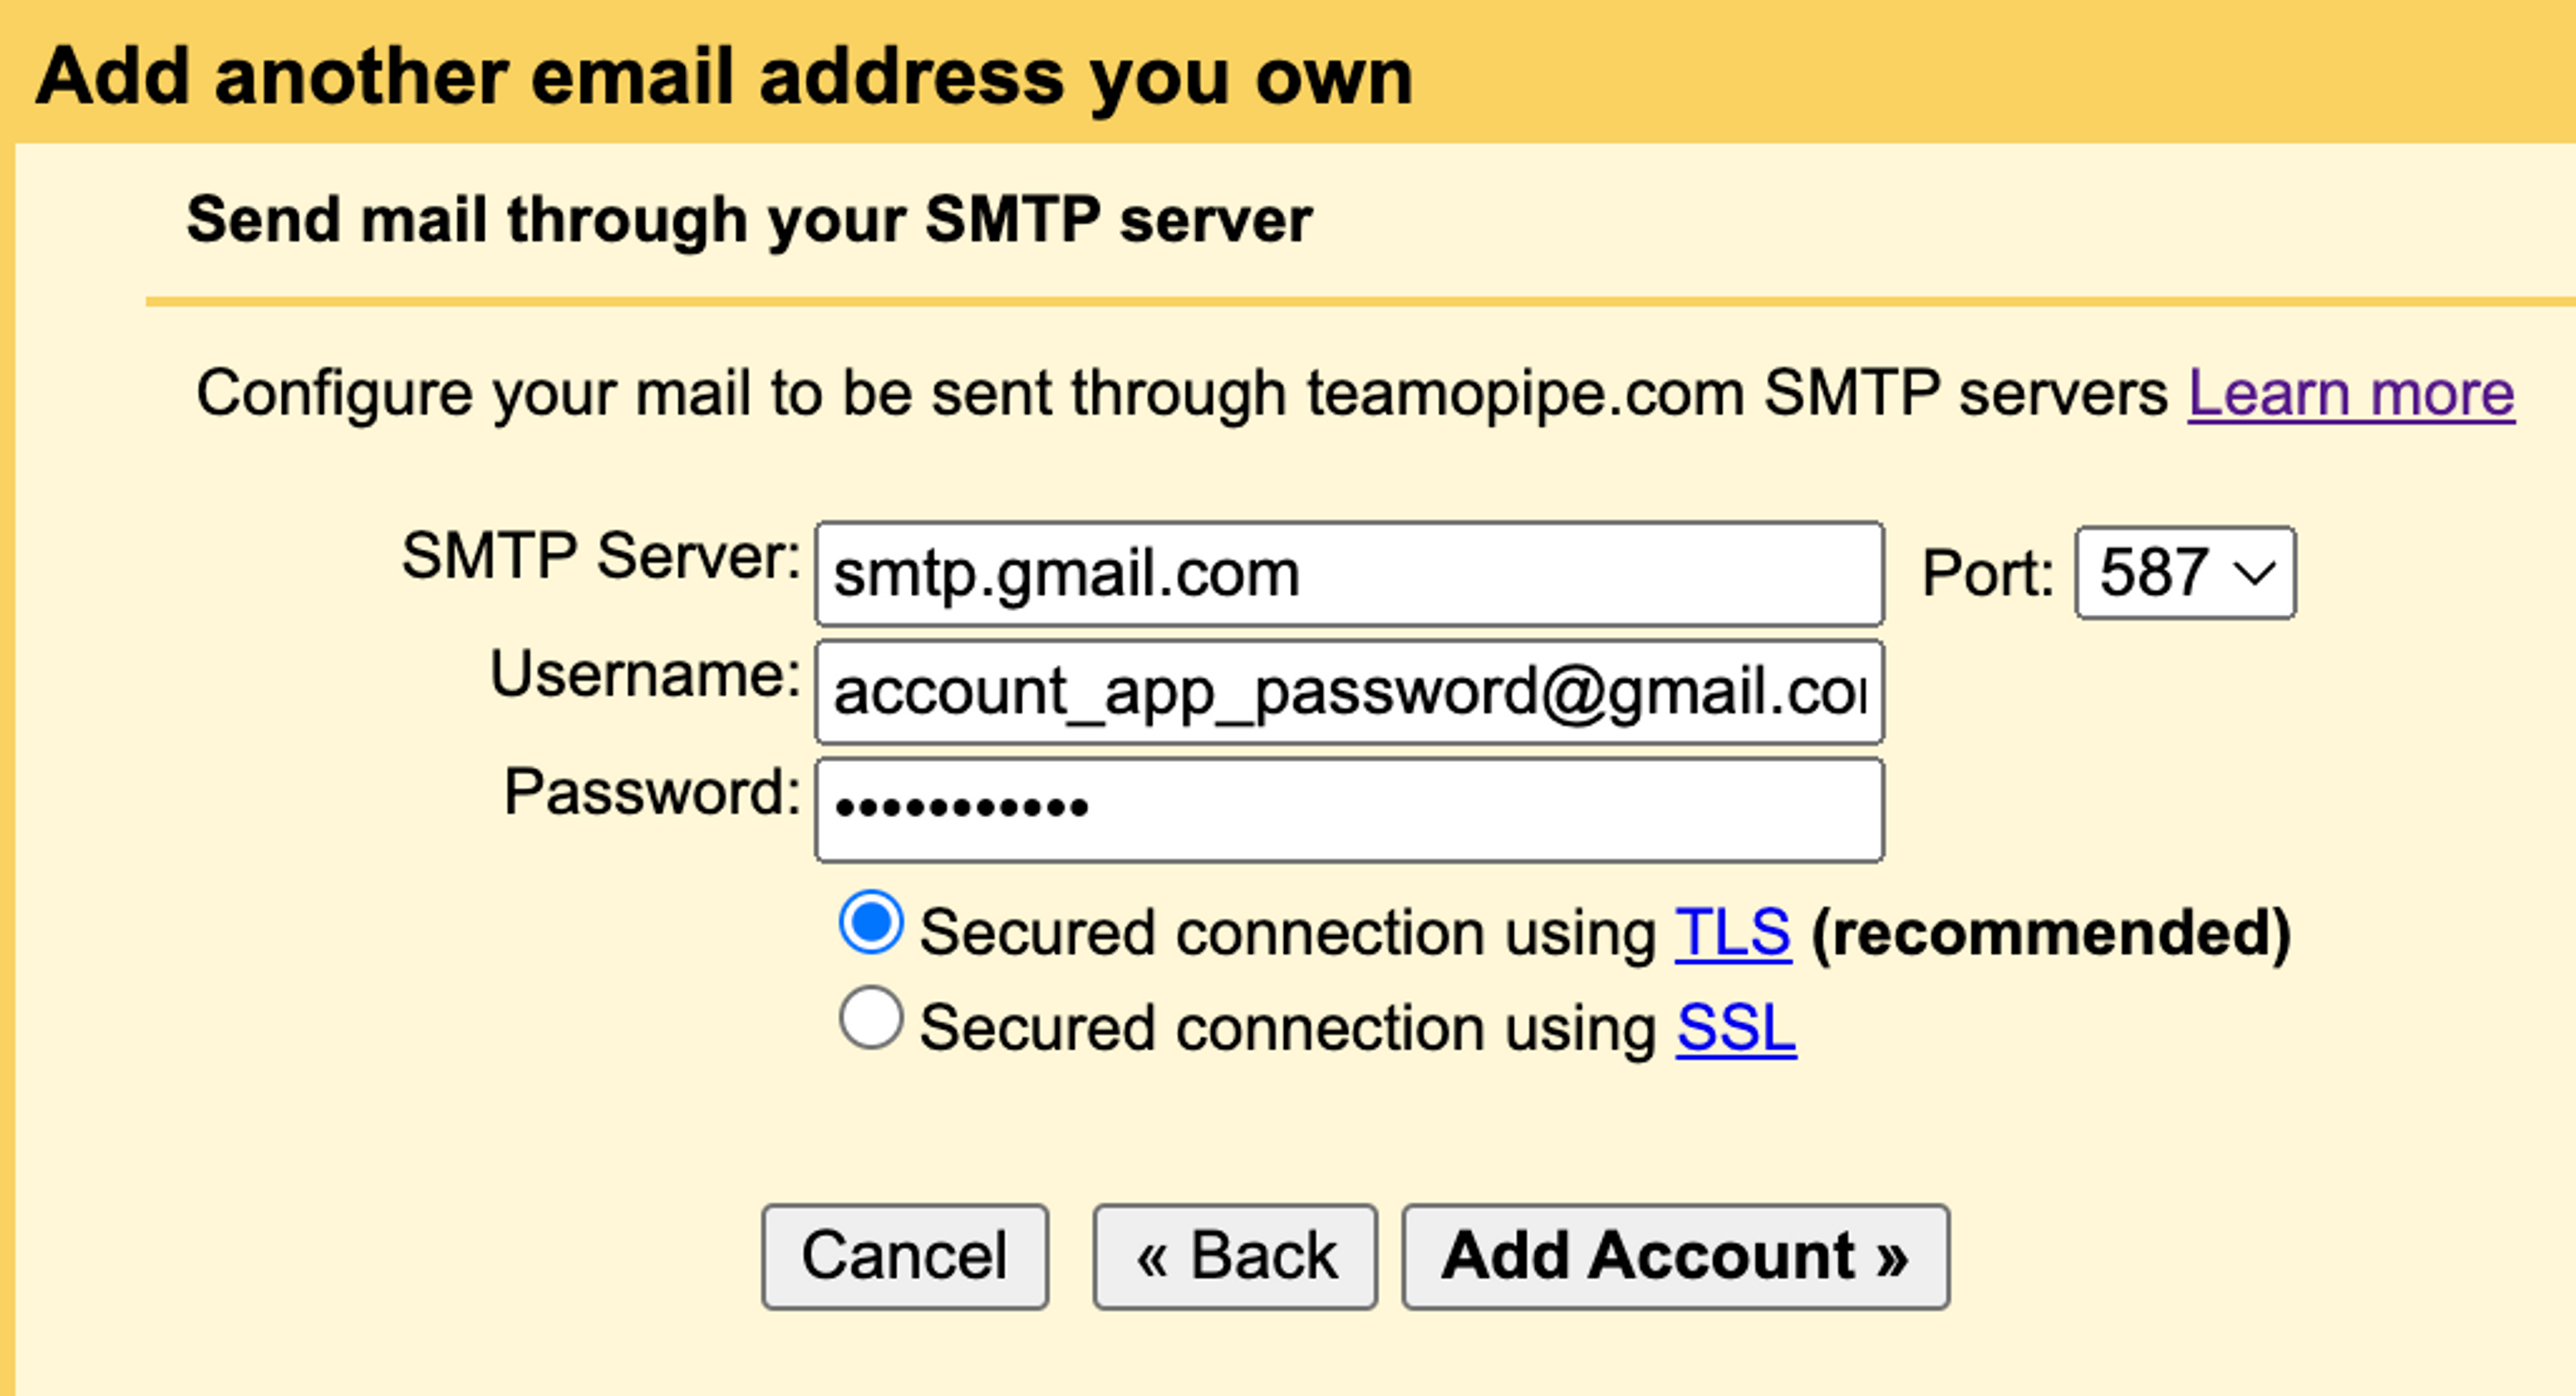
When this is done, you should receive another email confirmation, when you click on the link, all should be working.
Step 5: Test and Troubleshoot
With everything set up, it's essential to test your new personal domain email. Send and receive test emails to ensure a seamless experience.
Conclusion:
Congratulations on successfully setting up a personal domain email for free in Gmail with Cloudflare integration! Your communication now boasts a professional touch, and you've personalised your online presence. Followed our guide? You're now ready to enjoy the benefits of a customised email experience without spending a dime.
What about improving your gmail workflow?
In case you are looking for a way how to better manage your communications in Gmail, you could have a look at our product Teamopipe. We turn your email client into a fully functional customer management system. Click the button below to get started:
